Hosting your own Hytale server opens the door for endless possibilities, such as modding! Whether you want to reshape the entire game or subtly add new features, you’re in control. Hytale’s modding framework and tools empower you to create original content. In this Apex Hosting guide, we’ll show you how to install mods, plugins, and assets on your Hytale server!
Hytale Mods Explained
There are 3 categories of mods in Hytale:
- Packs – Used to add or modify blocks, mobs, items, and behaviors using the Asset Editor, without requiring any coding experience.
- Plugins – Uses the API to extend vanilla functionality and introduce new features or content, written in Java.
- Early Plugins – Runs outside the standard plugin system to perform low-level class modifications by injecting or altering bytecode during loading.
Packs and plugins are meant to complement each other, with packs focusing on assets and data, while plugins handle logic, interactions, and more complex systems.
Installing Mods on Your Hytale Server
We have an automatic installer that allows you to search for mods and quickly install them in just a few clicks! Look up specific keywords or explore categories to find exactly what you want – all on your Hytale server panel. If you already have mods downloaded on your computer or have custom ones, you can manually install them.
Modbox (Automatic)
- Head towards your Apex server panel, then stop the server.
- Navigate to
Server Configuration > Modboxon the left.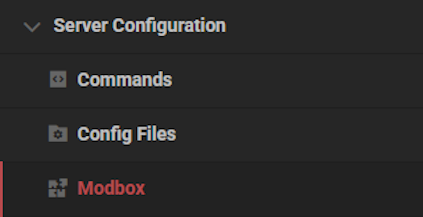
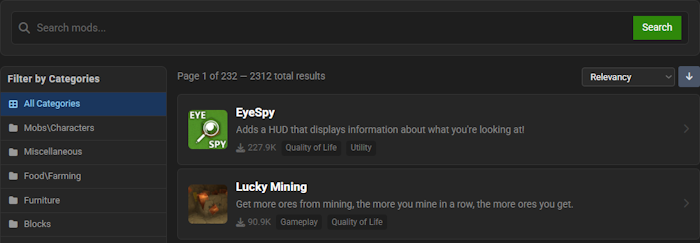
- Find a mod via categories or the search bar, then select it.
- Choose a version and click
Install.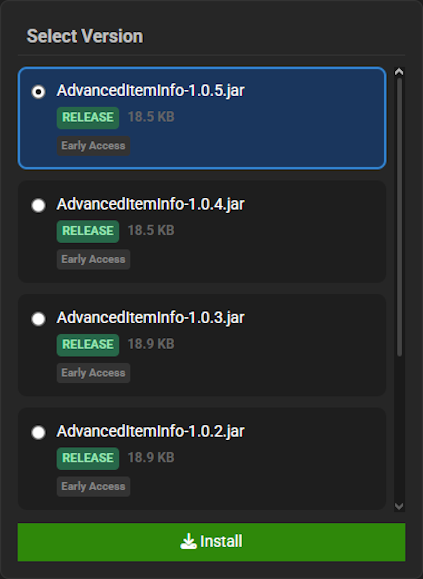
- If successful, you will see a confirmation message.
You can repair, update, or uninstall mods by clicking Managed Installed at the top left.
Manual Installation
- Head towards your Apex server panel, then stop the server.
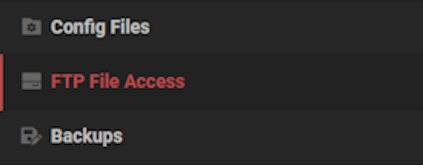
- Navigate to
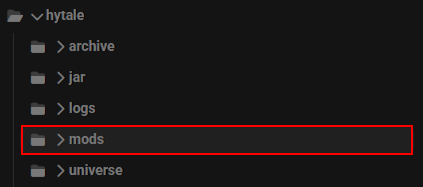
File Management > FTP File Access, then login with your password. - Locate the
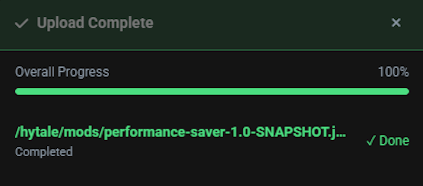
modsfolder, then drag + drop your mod file(s) into it. - Wait for them to finish uploading, then return to the main panel.
- Startup the server, then join to confirm everything was installed.
Tip: You can use the plugin list command via Console to view all installed plugins!
Hytale Early Plugins Setup
⚠️ Warning: Only use early plugins if you absolutely need to on your Hytale server!
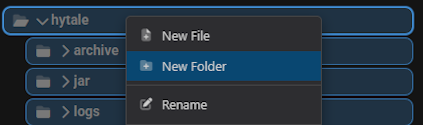
- Navigate to your server panel, stop the server, then click FTP File Access & login.
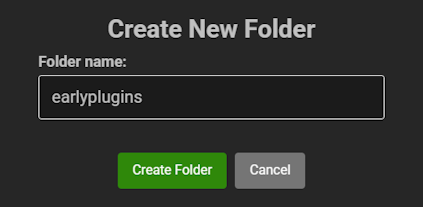
- Right-click the
hytaledirectory, then click the New Folder option. - Name the new folder “earlyplugins”, then confirm by pressing New Folder again.
- Drag + drop your early plugin files in this folder, then wait for them to finish uploading.
- Startup the server to begin loading the early plugins.
Recommended Plugins
These are pre-installed on your Apex Hosting Hytale server:
- Nitrado:WebServer – Base plugin for web applications and APIs
- Nitrado:Query – Exposes server status (player counts, etc.) via HTTP
- Nitrado:PerformanceSaver – Dynamically limits view distance based on resource usage
- ApexHosting:PrometheusExporter – Exposes detailed server and JVM metrics
How to Make Models for Hytale
Creating entirely new models, textures, or animations requires the Hytale Blockbench Plugin. This tool is essential for building custom assets that go beyond the game’s default models, giving you full control over their design and structure. With it, you can model, texture, animate, and export assets using supported formats before bringing them into Hytale. Click here to learn more!
How to Make Custom Asset Packs in Hytale
- Start Hytale and load into either a singleplayer world or a multiplayer server.
- Make sure your account has admin permissions before continuing.
- Switch to Creative Mode by entering
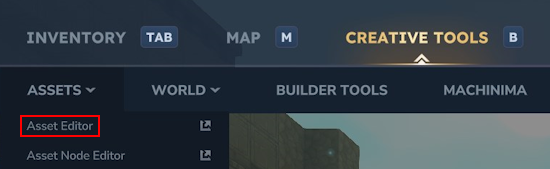
/gamemode creativein chat. - Press B to open the Creative Tools menu, then navigate to Assets > Asset Editor.
- Select the three dots in the top-left corner and choose Add Pack.
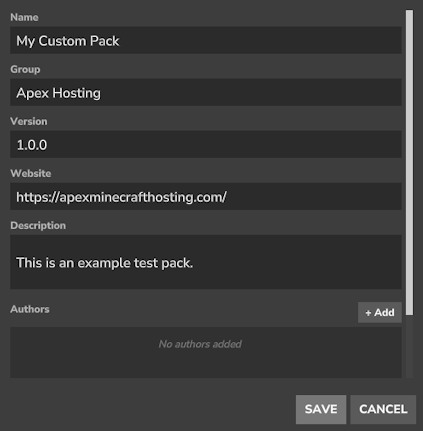
- Fill out the required details such as the pack name, group, and version, then click Save.
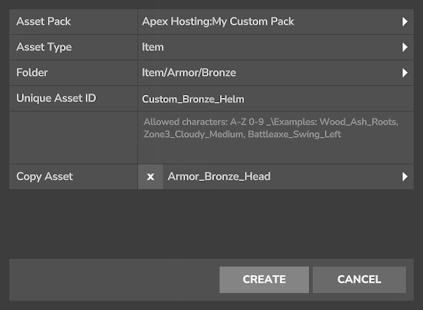
- Use the Plus (+) icon near the top-left to create a new asset.
- Pick an asset type, create any needed folders, and assign a unique Asset ID.
- Click Create to begin editing, and copy parent assets if required.

Hytale Mods for Server
Hytale’s modding framework is easy-to-use and has depth so you can be creative. This lets you shape the look, feel, and behavior of your server – from visual asset packs to QoL plugins. Test changes carefully, maintain regular backups, and reserve early plugins for situations where no other solution will work. Begin creating and customizing your Hytale server, today! 🔥
Hytale Server Mods – FAQ
Where can I download mods for my Hytale server?
You can find a wide range of mods, assets, and plugins on community platforms such as CurseForge and HytaleModding.
Can packs and plugins be used together on a Hytale server?
Absolutely. Asset packs and plugins are designed to work side by side, each handling different aspects of customization to enhance your server experience.
Where are mods located on my Hytale server?
Regular mods and asset packs are stored in the mods folder, while early plugins belong in earlyplugins directory. Access them via the FTP File Access area from your server panel.
Why aren’t my early plugins loading correctly?
Make sure an earlyplugins folder exists inside the main hytale directory. Upload your early plugins directly into this folder, then restart the server to apply the changes.
Do asset edits take effect immediately on my server?
Yes. Any adjustments made through the Asset Editor, such as renaming an item, are applied automatically without requiring a restart.
Is it safe to remove mods from my Hytale server?
In most situations, yes. However, removing a mod that other mods rely on can cause issues. We encourage you to safely test by deleting mods one at a time.
Do I need programming knowledge to create mods for Hytale?
No coding experience is needed to create asset packs, as everything can be done using the Asset Editor. Java knowledge is only required if you plan to develop plugins.