Overview
One of the biggest concerns for server owners is lag. Lag can be caused for a variety of reasons, whether it’s from what you build, collect and mine on your server or the hardware your server runs on. However if you host with Apex hardware shouldn’t be an issue. There are certain Spigot plugins that can help reduce lag caused by resources or players. ClearLagg is one of the most common plugins for any type of Minecraft server. Essentially what it does is allows you to remove any trouble entities that may exist on your server. Perhaps someone dropped thousands of items in a single chunk, causing your server to lag. This plugin clears dropped entities, ClearLagg ensures that your server stays operating smoothly.
Plugins require you to run a Paper ( We recommend Paper ) or Spigot jar in order to load the ClearLagg on your server. You can find a guide on changing your server jar here.
Modbox Installation
IMPORTANT: Make sure to have Spigot or Paper selected in the Game File option on your server panel so plugins can work properly.
- Head towards your Apex server panel for the server.
- Navigate to
Server Configuration > Modboxon the left.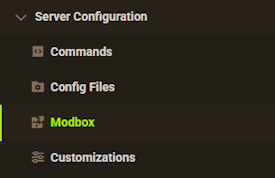
- Choose the version and search for the plugin you want, then select it.
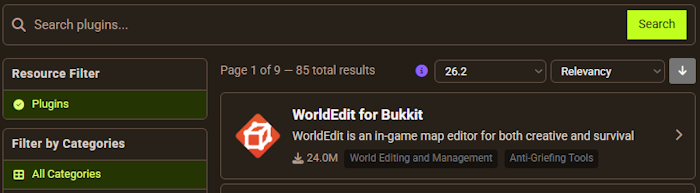
- Click
Installon the left and wait for it to be installed. - Restart the server to load the plugin. Repeat this process for any other plugins.
Manual Installation
Download ClearLagg on Bukkit or Spigot and follow these steps:
- Download the plugin file from the link above.
- Head towards your Apex server panel for the server.
- Locate the Game File option, then select Spigot or Paper if you haven't already.
- Navigate to
File Management > FTP File Accessand login. - Drag + drop the .jar file in the
pluginsdirectory. Alternative: Click theUploadbutton and select the file. - Wait for this to finish, then return to the main panel.
- Restart the server and the plugin should load properly once you join.
How to use ClearLagg
Commands
- /lagg clear: This clears all of the ground entities
- /lagg check: This command counts all of the entities in the world.
- /lagg reload: Reloads schedulers/config file
- /lagg killmobs: This kills all of the mobs in the world
- /lagg area : Removes entities within the given radius
- /lagg chunk: This locates the largest chunks
- /lagg admin: List the admin commands
- /lagg tps: Views the servers current TPS
- /lagg halt: Disables basic server functions such as mob spawning
- /lagg: List all of the commands for ClearLagg
Configuration File
If you make any changes make sure to stop your server first and then click save on the page before you start or restart your server. You can find your configuration file by heading to, the config tab on the left of the main panel page, then find your config for Clearlagg, and clicking on the name of the plugin. Most things in the config file are disabled by default and any line with a “#” in front of it is also disabled.
Broadcast Message
One of the most common configuration changes made is the broadcast message. If you would like to change the messages that are broadcast or disable them you’ll need to scroll down to the “auto-removal” portion of the config doc where you’ll find the “broadcast-message” and the “warnings” section, both of which can be changed to your liking, make sure that you follow the given format.
Entities
Another part in the configuration that you may want to modify is the entities that are removed when lag is cleared. In the configuration, locate the ‘auto-removal:’ section. Below it, you will see some items listed and set to either true or false. You can enable and disable which entities you want removed when lag clears. For example, if you wanted to stop minecarts from being removed you would find `minecart: true` and set it to false.
You can find an in-depth walkthrough of the config here.
Conclusion
Clearlagg is one of the most essential plugins for Minecraft servers, having it helps significantly with lag reduction which is a key part to owning a public server. This plugin is nice because there is not much configuration you will have to do for it, but if you wanted to get configure it more detailed, that is possible as well. Don’t forget that plugins will not work unless your server is running Spigot or Paper.