Plugins are one of the best ways to customize your Minecraft server, unlocking endless possibilities. Dynmap takes things a step further by creating a real-time online map of your world, similar to Google Maps, that players can view in their browser. It even integrates with plugins like Factions and Towny for extra functionality. In this Apex Hosting guide, we’ll show you how to set up Dynmap on your Minecraft server.
How to Install Dynmap
- Head towards your Apex server panel and click Stop at the top.
- Navigate to
Server Configuration > Plugin Liston the left.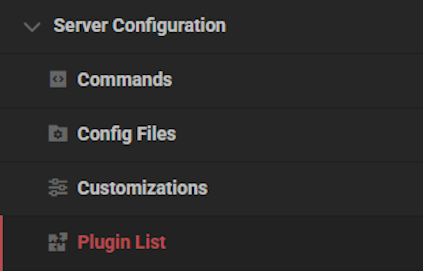
- Type “Dynmap” in the
Nametext field and pressEnteron your keyboard.
- Click on the Dynmap plugin, then press
Installat the bottom.
- Wait for this to complete, then return to the main panel.
- Press the Start button and wait for the server to load.
⚠️ You can also manually install Dynamp via the FTP File Access area.
How to Set Up Dynmap
- Head towards your Apex server panel and click Stop at the top.
- Navigate to
File Management > FTP File Accessand login.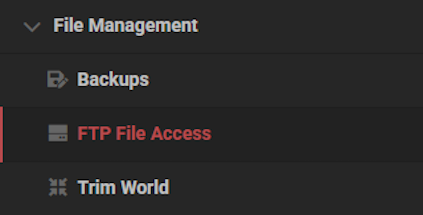
- Enter the
plugins / dynmapdirectory in the server file list.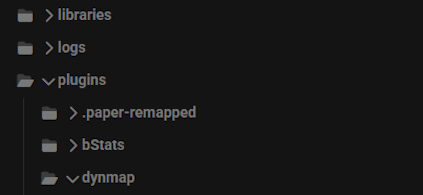
- Locate and open
configuration.txtby double clicking on it.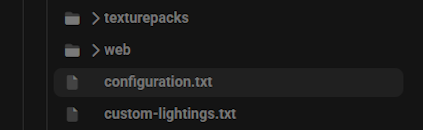
- Change the
deftemplatesuffixoption tovlowresORlowres.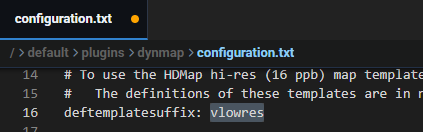
- Locate
webserver-portand edit it to anything higher than 1024.
Default port is normally taken, hence the required change.
- Find the
image-formatoption and change this tojpg.
- Click
Saveat the bottom and return to the main panel. - Press the Start button, then wait for the server to come online.
- Navigate to
Server Management > Consoleat the top left.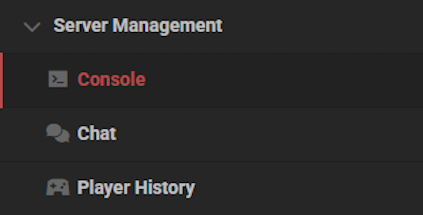
- Enter the
dynmap fullrender [world]command.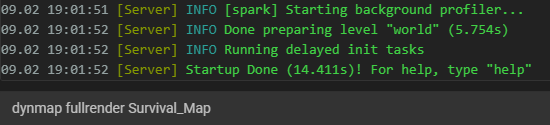
If successful, make sure to use the correct world name for the map to render properly.
How to Add a Resource Pack
Find and download any resource pack you want displayed on the Dynmap. Once you do that, follow the instructions below to get started.
- Head towards your Apex server panel and click Stop at the top.
- Navigate to
File Management > FTP File Accessand login. - Enter the
plugins / dynmap / texturepacksdirectory.
- Drag + drop the downloaded resource pack .zip file into this location.
- Open the
custom-shaders.txtfile from the dynmap main folder.
- Copy and paste the following to overwrite the file:
shaders:

  - class: org.dynmap.hdmap.TexturePackHDShader

    name: stdtexture

    texturepack: [Name of Resource Pack.zip]
Example: Faithful+1.13.2-rv2.zip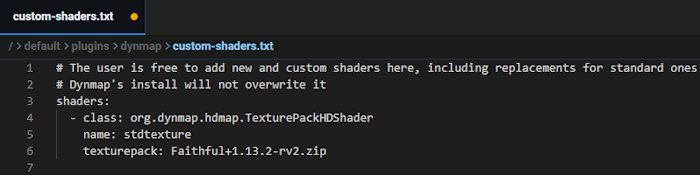
- Click
Saveat the bottom, then return to the main panel. - Press Start at the top and enter the
Consolefrom the top left. - Enter the
dynmap fullrender [world]command to apply the changes.
Conclusion
Dynmap is an incredible addition to any Minecraft server, giving players a live, interactive map they can access from their browser. They can view explored terrain, track player locations (if enabled), plan builds, scout bases, and even see town or faction claims in real time. It adds a whole new layer of strategy and community interaction outside the game itself. With the right setup and enough resources, Dynmap turns your world into something players can explore anytime, anywhere.
⚠️ If you have issues setting up your Dynmap plugin, click here!
Common Issues
Port is taken: When configuring Dynmap, it’s important that you change the webserver-port to a random 4 digit number. If you run into an error saying the port is taken, you will need to change it to another number.
Hires causing performance issues: It is very important to set the deftemplatesuffix to vlowres or lowres, if you do not to this you will almost always run into performance issues on the server.
Using MySQL and not FileTree: Maps can become several gigabytes in size, which can tank your MySQL performance. It is best you use the default setting, FileTree.
Texture pack not loading: If you have set the texture pack and it is still not working, there are a few things you need to check for. The first is that you set the “texturepack:” section to the exact filename of the resource pack you uploaded. If that’s correct, check that the resource pack you downloaded is made for the same version of Minecraft that you are running.