Overview
When playing on Minecraft servers, one of the most common ways for players to express themselves is with the use of skins. Skins are the perfect way to add customization to Minecraft characters. While these are great, when running an offline server, or ‘cracked’ Minecraft server, skins can be disabled. This problem can occur because cracked servers do not authenticate with the Mojang skin servers. Although it’s upsetting to lose character skins, it is not impossible to enable them! This will be a brief guide on how to restore the skins for you and your players. The bread and butter of this guide will be utilizing a plugin called SkinRestorer, which is approved for all versions 1.8 and above, including 1.16!
Modbox Installation
IMPORTANT: Make sure to have Spigot or Paper selected in the Game File option on your server panel so plugins can work properly.
- Head towards your Apex server panel for the server.
- Navigate to
Server Configuration > Modboxon the left.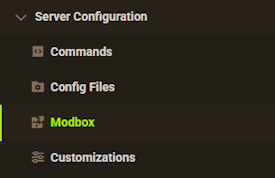
- Choose the version and search for the plugin you want, then select it.
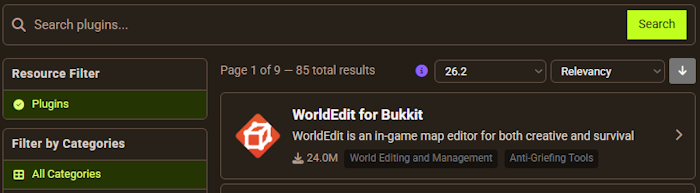
- Click
Installon the left and wait for it to be installed. - Restart the server to load the plugin. Repeat this process for any other plugins.
Manual Installation
Download SkinsRestorer and follow these steps:
- Download the plugin file from the link above.
- Head towards your Apex server panel for the server.
- Locate the Game File option, then select Spigot or Paper if you haven't already.
- Navigate to
File Management > FTP File Accessand login. - Drag + drop the .jar file in the
pluginsdirectory. Alternative: Click theUploadbutton and select the file. - Wait for this to finish, then return to the main panel.
- Restart the server and the plugin should load properly once you join.
How to use Skinsrestorer
Commands
/skin - main command.
/skin  - Sets your skin.
/skin  - set a skin from a .png url
/skin update - Updates your current skin.
/skin clear - clears your skin.
/skins - GUI
Admin Commands
/sr - main admin command
/skin set   - Sets player's skin.
/skin clear  - clear a player's skin.
/skin update  update a player's skin.
/skin drop  - Removes skins data from database.
/sr reload - Reloads config and locale.
/sr props  - Returns properties of a player.
/sr status - check the plugin status.
Permission Nodes
skinsrestorer.bypasscooldown -> bypasses skinscooldown config
skinsrestorer.bypassdisabled -> bypass the disabledskins list
Common issues
Skin not updating
If you’ve put in the proper commands and the skin does not immediately change, you should disconnect and then reconnect to the server. If that still does not work, you should check the name of the skin you’re trying to snag and ensure it’s spelled correctly.
Conclusion
SkinRestorer has a bunch of other features as well that you can implement to your server, such as denying users from using certain skins or allowing them to swap skins on the fly while playing. You can even change other users’ skins. Configuration of the files allows you to change the language, color codes, and more of the actual commands. Well, that’s everything! I hoped this guide has helped you fix a somewhat common issue. Until next time!
Related Content
How to add plugins to your server
How to change the Minecraft Server Version