Overview
No matter where you travel to on a vanilla Minecraft server, you will find mobs scattered everywhere. From the overworld cows to fearsome wither skeletons, they make the game more exciting to play through. In most cases, many players find that mobs are too easy, even on the harder difficulties. This has been rectified thanks to LevelledMobs, a Spigot plugin that adds a level system to each server mob. The higher a level, the more speed, health, and damage will be added, creating fearsome foes. Night time will become even more dangerous, as creatures of varying levels will try to hunt you down. Installing plugins is easy with our Apex Hosting panel uploader, so we have created this guide to help you get started.
Installation
Note: If your server is running 1.16 or later, LevelledMobs also requires the ProtocolLib dependency to function properly. Install it first using either method below, then return here to continue.
Note: While the latest download of LevelledMobs should work across many versions, you can enter the Version History tab on its Spigot page to obtain a specific download for the plugin.
Modbox Installation
IMPORTANT: Make sure to have Spigot or Paper selected in the Game File option on your server panel so plugins can work properly.
- Head towards your Apex server panel for the server.
- Navigate to
Server Configuration > Modboxon the left.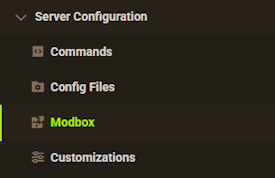
- Choose the version and search for the plugin you want, then select it.
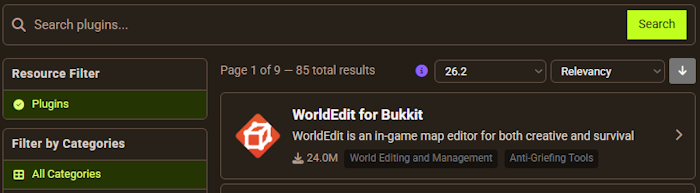
- Click
Installon the left and wait for it to be installed. - Restart the server to load the plugin. Repeat this process for any other plugins.
Manual Installation
Download LevelledMobs on Bukkit or Spigot and follow these steps:
- Download the plugin file from the link above.
- Head towards your Apex server panel for the server.
- Locate the Game File option, then select Spigot or Paper if you haven't already.
- Navigate to
File Management > FTP File Accessand login. - Drag + drop the .jar file in the
pluginsdirectory. Alternative: Click theUploadbutton and select the file. - Wait for this to finish, then return to the main panel.
- Restart the server and the plugin should load properly once you join.
How to Get Started
Upon spawning into your server, you may not immediately notice anything different. However as soon as new mobs begin to spawn, you will find a status bar floating above their head. This will display level, name, and health information.
Health Indicators

Each mob will have a health bar included above their heads. This bar will change depending on the level of the mob, which can scale up to have tons more health than the player. Even the weaker mobs will still have almost double the player’s health. If the level becomes high enough, they can even become stronger than the Ender Dragon!
Difficulty Levels
As previously mentioned, each mob will have a unique level, which can be found to the far-left of their status bar. Depending on the difficulty preset, each leveled mob will have a color to match its strength, ranging from green to purple. It’s recommended to avoid the higher levels in the early game, as they may be too tough of an opponent to defeat.

Configuration
While the base plugin is quite simple to use, the true power is in the various configuration files. This will allow you to tweak the behavior of the plugin and mobs as a whole. For more information on configs and commands, visit the LevelledMobs Wiki.
- Stop the server, then enter the
FTP File Access. - Locate and enter the
pluginsfolder, followed byLevelledMobs.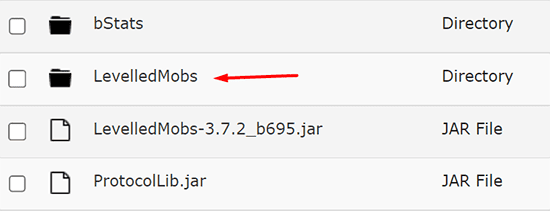
- Here, find the file you wish to adjust, then press
Editto the far-right. - After making your changes, press
Saveand restart the server.
settings.yml

The Settings.yml file is primarily to adjust the core functions for the plugin, which mostly consists of advanced settings that should normally remain untouched. Other settings include checking for plugin updates, multiplying head drops, and kill skip conditions.
rules.yml
The true customization settings for the plugin, the Rules config file allows you to change the various conditions relating to the mobs. You can adjust the multipliers for various statuses such as health, speed, damage, xp drops, and more. As part of this, you can also adjust the level range, status bar, and more.

customdrops.yml

The Custom Drops configuration allows you to completely create custom drops to create unique materials and custom commands. There are many customization options available for the custom items, such as the chance, required mob level, if the entity equips the item, and much more. as well.
messages.yml
The messages config file aptly allows you to change the various plugin messages that will appear. These include command usage results, invalid text, and more. In most cases you will not need to edit this, however it can allow you to personalize the experience a bit more.

Common Issues
Mobs don’t have the status bar:
After the plugin has been installed, all existing server mobs will not have the status bar above their heads or level changes. To ensure it is working, simply spawn in any mob to see if the bar appears. If not, use /plugins to see if the plugin appears. Otherwise, double check that the plugin has been installed into the plugins folder directly and not anywhere else, then restart again.
Config file changes are not saving:
Oftentimes, this occurs when there is a problem saving the config file directly. First, ensure you have stopped the server before making any changes, otherwise your adjustments may get overwritten. Otherwise, make sure your changes match the existing format, as any missing punctuation and indentations could break the file. Once these changes are complete, make sure you press the Save button and then restart the server.