One of the main features when hosting your own SCUM server is using admin commands. This comes in handy when you need to manage players, change options, and more! Whether you manually type commands or use the in-game admin panel, you have a few ways to do it. With this in mind, we’ve created this Apex Hosting guide to help you become an admin and use commands on your SCUM server 🔥
How to Become Admin on Your SCUM Server
Please locate your Steam64 ID before following these instructions, which can be found here. Simply enter your Steam Account Username, then copy the ID and paste it when prompted below:
- Head towards your Apex server panel, then click “
FTP File Access” to the left.
- Login with your password, the navigate to:
...SCUM/Saved/Config/WindowsServer - Locate the
AdminUsers.inifile, then click “Edit” to open its contents.
- Proceed to enter your
Steam64 IDin the list, do the same for other accounts. - Add commands in brackets for each account, separate with commas as needed.
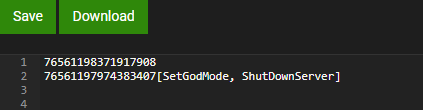
E.g.
[SetGodMode, ShutDownServer]or[SetGodMode] - Once you’re finished, click “
Save” at the top and restart the server.
SCUM Admin Commands
After becoming an admin on your SCUM server, you can begin executing commands in-game. Here is the complete list of them according to the wiki:
General Commands
| Command | Description |
|---|---|
| #Announce <Message> | Sends a global message to all players. |
| #Location [Player] | Displays the coordinates of the specified player. If no player is specified, shows your own location. |
| #ListAnimals | Lists all spawnable animal types. |
| #ListItems [Keyword] | Displays all items containing the keyword. Lists everything if left blank. |
| #ListMutedPlayers | Shows all players currently muted. |
| #ListPlayers | Displays all connected players. |
| #ListSpawnedVehicles | Lists all vehicles on the server and their locations. |
| #ListSquadMembers <SquadID> [true/false] | Shows all members in a squad. If true, copies results to clipboard. |
| #ListSquads | Lists all squads on the server. |
| #ListZombies | Lists all available puppet (zombie) types. |
| #VisualizeBulletTrajectories <true/false> | Enables or disables bullet trajectory visualization (only visible to you). |
| #VisualizePlayerAiming <true/false> | Enables or disables player aim direction visualization (only visible to you). |
Environment Commands
| Command | Description |
|---|---|
| #SetTime <0-24> | Sets the in-game time. Use values from 0 (midnight) to 24 (end of day). |
| #SetWeather <0.0-1.0> | Adjusts the weather intensity. 0.0 is clear skies, 1.0 is full storm. |
Player Control Commands
| Command | Description |
|---|---|
| #Ban <Steam64ID> | Bans the player until manually unbanned. |
| #Kick <Player> | Kicks the player from the server. |
| #Mute <Player> | Prevents the player from using chat. |
| #UnMute <Player> | Allows the player to use chat again. |
| #Unban <Steam64ID> | Removes a player’s ban. |
| #ResetSquadInfo <SquadID> | Clears squad name and info. |
| #SetFamePoints <Value> <Player> | Sets fame for the specific player. |
| #SetFamePointsToAll <Value> | Applies fame points to all players (online & offline). |
| #SetFamePointsToAllOnline <Value> | Applies fame points to currently online players only. |
| #SetGodMode <true/false> | Toggles god mode for the player. Requires the [godmode] tag in the AdminUsers.ini. |
| #SetHairLength <0–1> | Adjusts the hair length. |
| #SetFacialHairLength <0–1> | Adjusts beard length. |
| #Teleport <X> <Y> <Z> [Player] | Teleports the specified player (or yourself) to coordinates. |
| #TeleportTo <TargetPlayer> [Player] | Teleports one player to another. |
| #TeleportToMe <Player> | Brings a player to your location. |
| #TeleportToVehicle <VehicleID> | Teleports you (or a player) to a vehicle by ID. |
Spawn / Despawn Commands
| Command | Description |
|---|---|
| #DestroyAllVehicles Please | Destroys all vehicles. Must include the word “Please”. |
| #DestroyVehicle <VehicleID> | Removes the specified vehicle. |
| #SpawnAnimal <ID> <Count> | Spawns the specified animal type. |
| #SpawnRandomAnimal | Spawns a random animal near you. |
| #SpawnZombie <ID> <Count> | Spawns a specific puppet type. |
| #SpawnRandomZombie | Spawns a random puppet near you. |
| #SpawnVehicle <ID> | Spawns a vehicle in front of you. |
| #SpawnItem <ID> <Count> | Spawns one or more items near you. |
| #SpawnItem <Weapon_Mag_ID> <Count> AmmoCount <0–1> | Spawns magazines with a specific ammo fill percentage. |
Admin Panel Setup
For quick and easy access to an in-game admin panel, the following steps will help you get access. However, you must also have your Steam64 ID inside the AdminUsers.ini file too.
- Log into the “
FTP File Access“ area from the server panel. - Navigate to this directory:
...SCUM/Saved/Config/WindowsServer - Locate the
ServerSettingsAdminUsers.inifile and click “Edit“ on it.
- Proceed to enter your
Steam64 IDin the list, repeat for other accounts.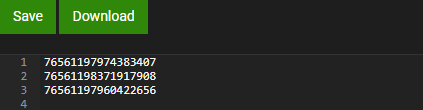
- Click “
Save“ at the top, restart the server, and join to access the in-game admin panel.
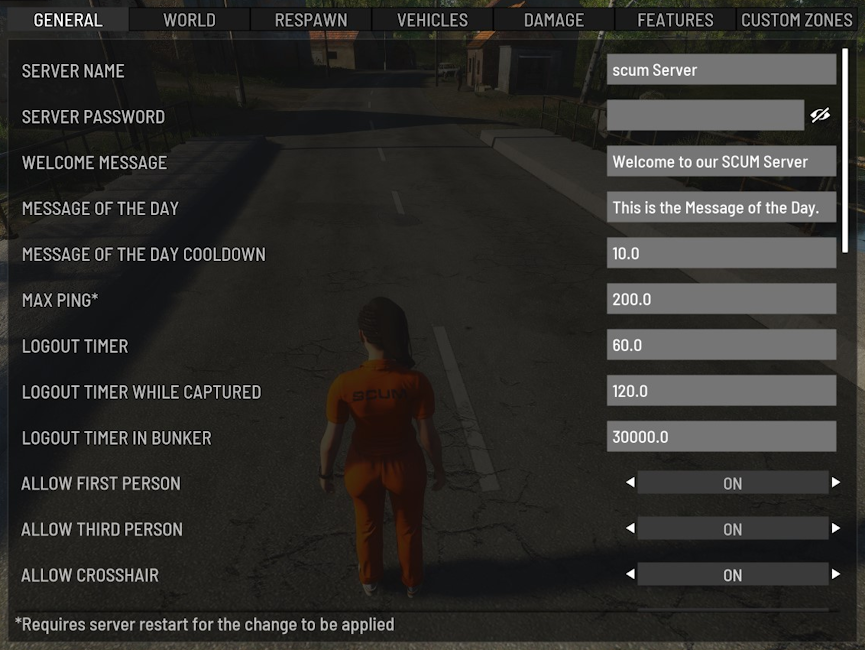
SCUM Admin Panel
Once you join the server, you’re able to access the admin panel directly from the menu. This allows you to perform various tasks, such as editing general options, zone configuration, spawning vehicles, and more. Keep in mind that certain changes require a server restart.
SCUM – Admin FAQ
You can use various third-party services to locate the Steam64 ID, but we suggest SteamID I/O. Enter your Steam Account Username in the search field and look it up. It will be a string of numbers, such as :76561197974383407. If you do not know your Steam Account Username, check your Steam Profile and look for the “/id/username” in the URL.
Make sure you entered the correct Steam64 ID in the AdminUsers.ini file, then save the changes and restart the server. Remember, you also need to manually add the commands for each admin using brackets. If you’re trying to use the admin panel, make sure you entered the Steam64 ID in both the AdminUsers.ini and ServerSettingsAdminUsers.ini files.
For any changes made in the config files from the Apex server panel, make sure to save the changes and restart the server. For changes made in-game via the admin panel, simply restart the server after editing settings. If this problem persists, contact our Support Team for help.
Admin Guide for SCUM Servers
By becoming an admin on your SCUM server, you now have access to various commands and features. These include god mode, zone configuration, spawning animals, and so much more. Whether you manually enter commands or use the admin panel, you have complete control over the server now. Make your changes, invite friends, and embark on new adventures! 👏